Key takeaways
- A laser-cleaned surface is dry and free of oil and oxide, so most jobs can go straight to welding or painting.
- Plan to weld or paint in the same shift, because bare steel flash-rusts in humid air.
- Some heavy-duty coatings need a deep profile that only blasting provides. Test adhesion on your own part.
- Write the cleaning-to-coating gap into your work instruction.
What the welder and painter get
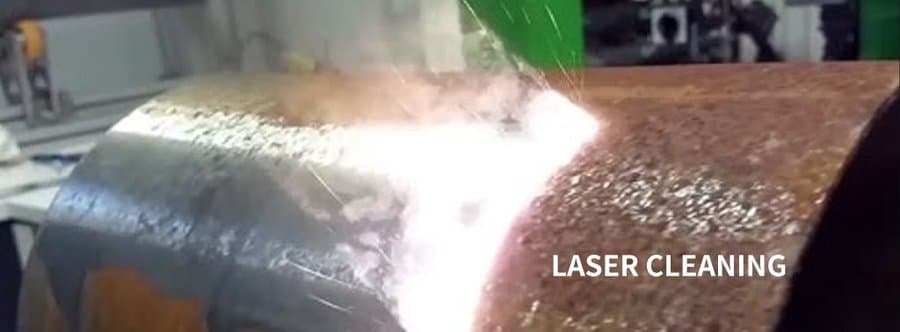
A laser-cleaned surface comes off dry, free of oil and oxide, with a fine texture that helps paint grip. In most cases you can weld or paint straight away. Welders notice fewer pores, because the arc meets bare metal instead of mill scale and grease.
Managing the time window
Timing is the part to manage. Freshly cleaned steel is very active, and in a humid workshop it starts to flash-rust within hours, so plan to weld or paint in the same shift. Also check your coating specification. Some heavy-duty coatings require a deep surface profile that only blasting provides, and an adhesion test on your own part will tell you which case you are in.
Before welding
Pre-weld cleaning is about the joint edge. The laser removes mill scale, oxide and oil from the groove and the zone beside it, so the arc meets bare metal. After welding, the same machine can remove heat tint from the bead and the surrounding area, so you do not need to switch to flap discs or pickling paste partway through the job.
Weld procedures and code requirements come from your engineer or inspector. Laser cleaning prepares the surface. It does not replace a qualified procedure.
Before painting or coating
Coatings need a clean, dry surface, and a pulse laser delivers that without water or solvent. The difference is the surface profile. A laser leaves a fine texture, while blasting leaves a deeper anchor pattern. Which one you need depends on the coating system, so read the data sheet from the paint supplier.
| Coating situation | Laser-cleaned surface | What to do |
|---|---|---|
| Standard paint on a general surface | Usually suitable | Coat in the same shift and check adhesion on a sample. |
| Keep the existing primer | Well suited | Tune the laser to remove only the topcoat. |
| Coating needs a deep anchor profile | May not be enough | Test adhesion first. Consider blasting for this step. |
| Long wait before coating | Bare steel will re-oxidise | Clean later, or protect the surface until coating. |
A simple adhesion check
Do not guess whether the surface meets the coating specification. Clean a sample area, coat it as you would in production, let it cure and test it with the method named in your specification. Keep the cleaning parameters with the test result, so the same recipe can be repeated on the production part.
Laser cleaning of coatings releases fumes. Use extraction, wear eyewear matched to 1064 nm and follow the safety rules for any paint that may contain hazardous substances.
Workshop checklist
- Confirm the coating or weld specification before cleaning.
- Clean only what you can weld or paint in the same shift.
- Store cleaned parts dry, and away from humid air.
- Run an adhesion test on a sample the first time.
- Save the cleaning recipe with the test result.
Common questions from welders and painters
Welding and painting teams usually care about three things: whether the surface is truly clean, how long it stays that way and whether the finished joint or coat will hold. The laser answers the first well. The second and third depend on how you manage the gap between cleaning and the next step, and on the specification you work to.
Write the gap into the work instruction. For example, state that cleaned parts must be welded or coated before the end of the shift, and that parts which wait longer are cleaned again. This small rule prevents most problems.
Why the surface behaves this way
Welding defects such as pores often start with contamination at the joint. Oil, moisture and oxide release gas into the weld pool. Removing them just before welding takes that source away. For painting, the same logic applies: paint grips clean, dry metal better than a surface covered with oil or loose oxide.
The fine texture left by the laser also gives paint something to key into. How much that matters depends on the coating, so the paint data sheet and your own test decide.
What to record
Record the cleaning parameters, the time between cleaning and welding or coating, the humidity in the shop, and the test result. After a few jobs you will know your own window, which is more reliable than a general rule.
Frequently asked questions
Can I weld straight after laser cleaning?
In most cases yes, provided the welding procedure for your job allows it and the part is welded within the time window.
Does laser cleaning change the metal under the weld?
With correct settings it removes the contaminant layer and leaves the base metal unchanged. Your inspector decides what your procedure requires.
Do I still need to degrease?
The laser removes oil as well as oxide. Check the result visually and with your usual cleanliness test.
What if the paint supplier asks for a blasted profile?
Run an adhesion test on a laser-cleaned sample. If it fails, use blasting for that step and keep the laser for precision areas and spot work.
Next step: see how weld preparation and post-weld cleaning fit your work on the applications page, or ask us about a sample test.